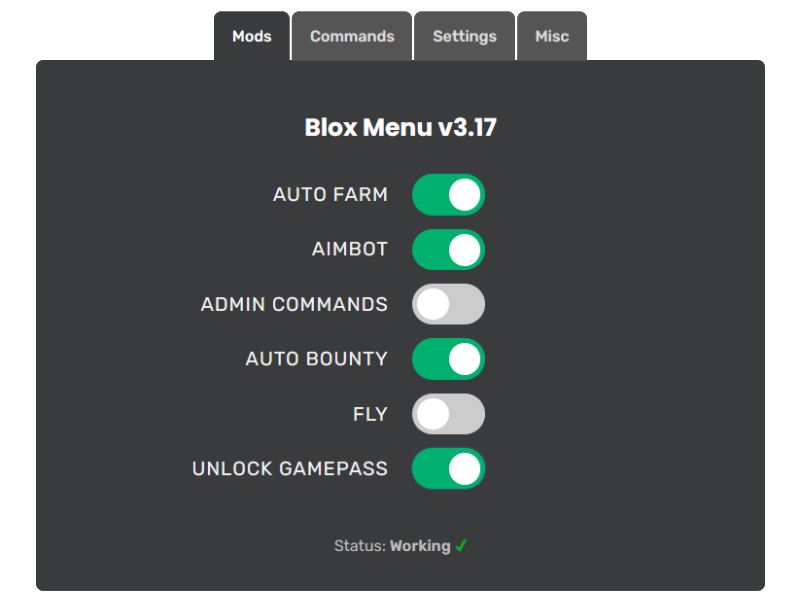
Brookhaven Mod Menu v3.8
-- Brookhaven Mod Menu Script

local player = game.Players.LocalPlayer
local playerGui = player:WaitForChild("PlayerGui")

-- Create a simple GUI
local screenGui = Instance.new("ScreenGui", playerGui)
local frame = Instance.new("Frame", screenGui)
frame.Size = UDim2.new(0.3, 0, 0.5, 0)
frame.Position = UDim2.new(0.35, 0, 0.25, 0)
frame.BackgroundColor3 = Color3.fromRGB(255, 255, 255)
frame.BorderSizePixel = 0

-- Title
local titleLabel = Instance.new("TextLabel", frame)
titleLabel.Size = UDim2.new(1, 0, 0.1, 0)
titleLabel.Text = "Brookhaven Mod Menu"
titleLabel.TextColor3 = Color3.fromRGB(0, 0, 0)
titleLabel.BackgroundColor3 = Color3.fromRGB(200, 200, 200)

-- Function to Fly
local function enableFly()
    local bodyVelocity = Instance.new("BodyVelocity")
    bodyVelocity.Velocity = Vector3.new(0, 50, 0)
    bodyVelocity.MaxForce = Vector3.new(0, math.huge, 0)
    bodyVelocity.Parent = player.Character.HumanoidRootPart
end

-- Button to Fly
local flyButton = Instance.new("TextButton", frame)
flyButton.Size = UDim2.new(1, 0, 0.1, 0)
flyButton.Position = UDim2.new(0, 0, 0.1, 0)
flyButton.Text = "Fly"
flyButton.BackgroundColor3 = Color3.fromRGB(100, 100, 255)
flyButton.TextColor3 = Color3.fromRGB(255, 255, 255)

flyButton.MouseButton1Click:Connect(function()
    enableFly()
end)

-- Function to Teleport
local function teleport(location)
    player.Character.HumanoidRootPart.CFrame = CFrame.new(location)
end

-- Button to Teleport
local teleportButton = Instance.new("TextButton", frame)
teleportButton.Size = UDim2.new(1, 0, 0.1, 0)
teleportButton.Position = UDim2.new(0, 0, 0.2, 0)
teleportButton.Text = "Teleport to Spawn"
teleportButton.BackgroundColor3 = Color3.fromRGB(100, 255, 100)
teleportButton.TextColor3 = Color3.fromRGB(255, 255, 255)

teleportButton.MouseButton1Click:Connect(function()
    teleport(Vector3.new(0, 10, 0)) -- Replace with actual spawn location
end)

-- Function to Change Weather (example feature)
local function changeWeather(weatherType)
    -- Implement weather change logic here
end

-- Button for Changing Weather
local weatherButton = Instance.new("TextButton", frame)
weatherButton.Size = UDim2.new(1, 0, 0.1, 0)
weatherButton.Position = UDim2.new(0, 0, 0.3, 0)
weatherButton.Text = "Change Weather"
weatherButton.BackgroundColor3 = Color3.fromRGB(255, 100, 100)
weatherButton.TextColor3 = Color3.fromRGB(255, 255, 255)

weatherButton.MouseButton1Click:Connect(function()
    changeWeather("Sunny") -- Example weather change
end)
Description
Our Mod Menu enhances your gameplay in the popular Roblox game Brookhaven. Unlock exciting features like exclusive cheats, new vehicles, character customization, teleportation, and hidden areas. With a user-friendly GUI, it’s easy to use across multiple Roblox games, offering endless creativity and fun in the immersive world of Brookhaven.
Features
Avatar Customization 👗
Change your character’s appearance with unique outfits and accessories.
Unlock Vehicles 🚗
Access and spawn vehicles, including cars, bikes, and special vehicles.
Teleportation 🌀
Instantly teleport to different locations in Brookhaven for quicker navigation.
Infinite Money 💰
Gain unlimited in-game currency to purchase houses, vehicles, and more.
Item Manipulation 🛋️
Spawn and manipulate various in-game items, such as furniture and decorations.
Speed Boost 🏃♂️
Move faster than normal, allowing for quicker exploration of the map.
No Clip Mode 👻
Walk through walls and obstacles for unrestricted access to any area.
Invisible Mode 🥷
Become invisible to other players, allowing for ultimate stealthy gameplay.
Animation Control 🎭
Access special animations for your character that aren’t available in the base game.
Weather Control 🌤️
Change the time of day and weather in the game for a customized experience.
Custom Commands 💻
Use various commands for quick access to features, making gameplay smoother.
Multi-Game Support 🌐
Our mod menu works across multiple Roblox games, not just Brookhaven.
Fly Mode ✈️
Soar through the skies of Brookhaven and enjoy a bird’s-eye view of the map.
Unlock Gamepasses 🎮
Instantly access exclusive gamepasses for enhanced gameplay.
Admin Controls 🔧
Take control of any server with admin capabilities to kick or ban disruptive players.
And much more. See all features.
DownloadInstallation Instructions
How to Install on Android
To install the Blox Menu on your Android mobile or tablet device, follow these steps:
- Download the Blox Menu .apk file from the official site.
- Locate the file in your Downloads folder.
- Enable installations from unknown sources in Settings > Security.
- Tap the .apk file to start installation.
- Follow the on-screen instructions.
- Launch Blox Menu from your app drawer.
- Open your Roblox game and tap to access the mod menu.
How to Install on PC
Follow these steps to install Blox Menu on your PC (Windows 7, 10, 11+):
- Download Blox Menu.exe file from our website.
- Once the download is complete, locate the file in your Downloads folder.
- Double-click the .exe file to start the installation.
- Follow the on-screen instructions to complete the installation.
- After installation, launch Blox Menu from your desktop shortcut or the Start menu.
- Open the desired Roblox game and press the designated key (F9) to access the mod menu.
If you encounter any issues during installation, please refer to our Troubleshooting Common Issues or consult the Installation Guide for further assistance.